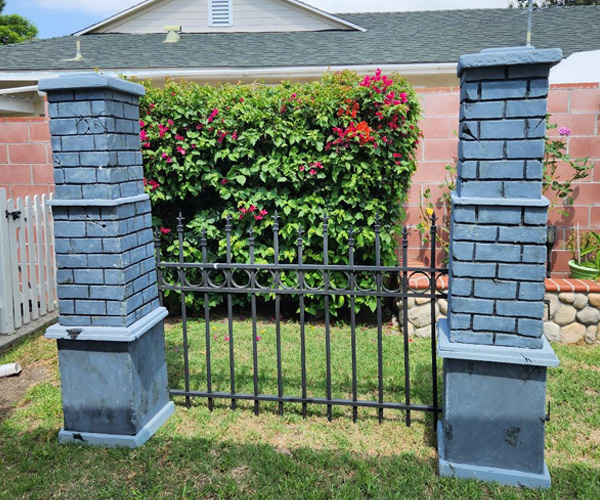
Does this happen to you? You have a ton of creative ideas for Halloween projects but then the time just passes by so darn quickly. This year was no different for me. Although time flew by, I was determined to get at least one good Halloween DIY project completed before October 1st. Last year I built two tall creepy columns to frame my Halloween yard haunt and hide some of my lighting and audio gear. This year I wanted to complete that build and fully integrate them into the fence. What was missing was a dramatic Halloween cemetery gate entrance that I could attach to the columns and fence. After seeing the Nevermore gate on Netflix’s hit show Wednesday, I thought “That’s it! I’m building a gate this year”. In this article I’ll show you how I built my Halloween gate and share images of how it completely improved the look of my yard haunt The Ghoulie Graveyard.
Getting Design Inspiration
The hardest part of any project is starting it. Something that has always worked for me though is sketching out ideas with pencil and paper. I’m no artist and my sketches look juvenile at best but it doesn’t matter. I can start getting a good sense of what looks good to me and what doesn’t work. I also use my computer to copy pasta ideas and pictures for inspiration. After a month or so of sketching and research I landed on this insanely great video and design from a fellow YouTuber. His columns are absolutely amazing and the gate is exactly what I was looking for. My gate would be sized differently to match my columns height but this was the design I really liked the best.
Building The Support Frame
I had no idea how heavy this gate was going to be. The first thing I had to do was to build a support attached to the columns so I could mount the gate. I didn’t have spare 2×4 wood, so I bolted two 2×2’s together with a 3 inch screw and impact driver. I’m always trying to save money so I’ll try to reuse anything I have laying around the house instead of buying new materials.
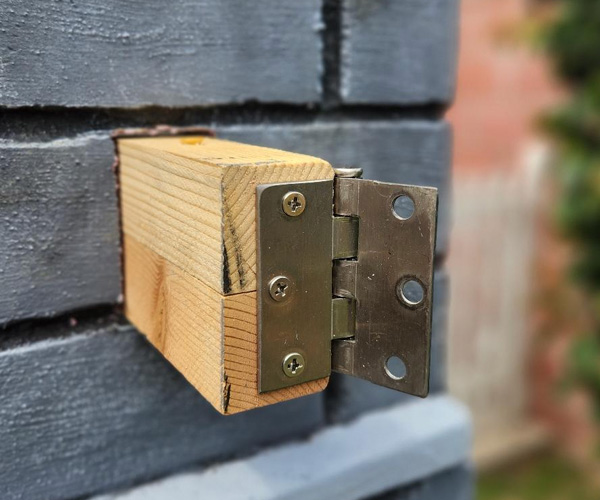
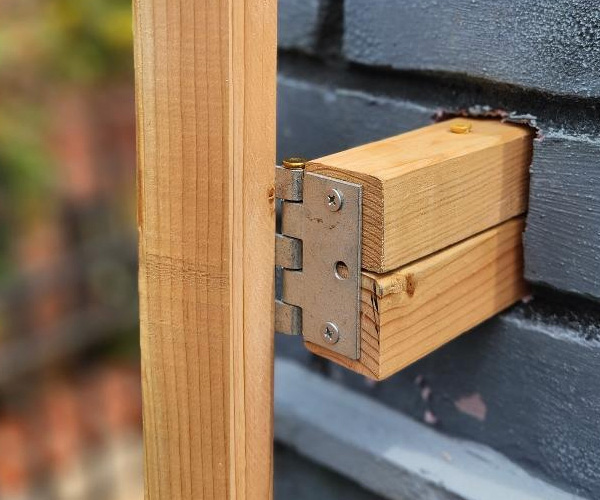
Next, I looked at the inside of the columns and found a place to secure the wood. I drew a rectangle on the outside of the column in the shape of the 2×4 support then just carved out the foam so the wood supports could slide through from the inside. This was repeated on the top and bottom of each column. Once those supports were in, I attached stainless steel hinges to the wood supports. I made sure that the hinges were mounted to allow the gate to swing inwards towards the graveyard.
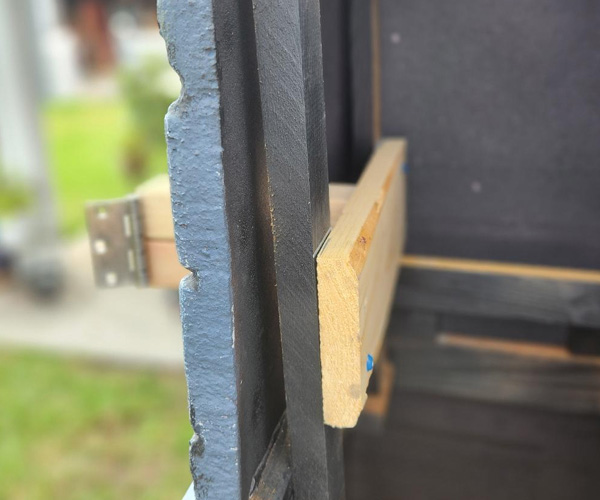
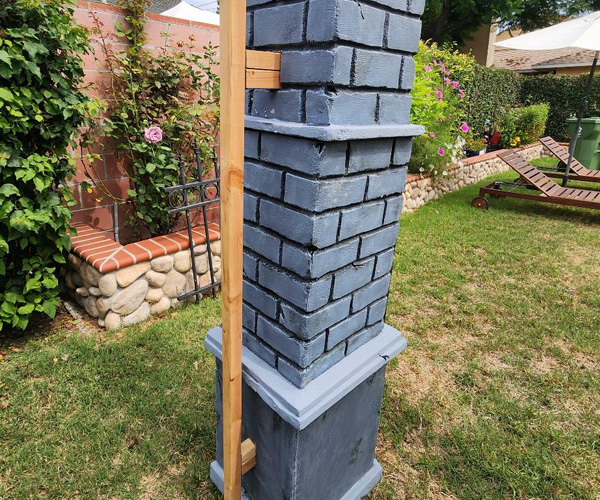
Next I attached a long 2×2 to both top and bottom metal hinges. That allowed me to mark my desired length of the wood and cut accordingly. I made sure the vertical frame was mounted so that it was about 6 inches off the ground.
Measuring The Gate Width
When both vertical supports were mounted, I positioned the columns where I thought they needed to be to allow good viewing from the outside of the graveyard. It took a good amount of positioning, adjusting and standing back just eyeballing it. I decided to make each gate 30 inches wide at the base. I cut a 1×2 at 30 inches long and screwed it to the vertical support 2×2. It did not feel stable at all so I added some L brackets on the inside corners. Then I just reattached to the vertical supports to get my measurements down as good as I could. I just wanted to make sure the gates would close without hitting each other or leave a wide gap in the middle where they met. I feel like I did this a ton of times but you know what they say. Measure twice, cut once!
Framing The Gate
Next step was to add stability to each gate and complete the framing. I screwed another long 2×2 to the other end of the vertical frame. Using some custom made square tools I made sure the corners were as square as possible before attaching them together with wood screws. I cut two more 1×2’s to add horizontally to the middle of the gate. These I just measured to see how long they should be. Mainly they added support for the heavier 2×2’s and kept everything square. The L brackets I used on the inside corners were key to keeping them stable.
Adding Vertical Bars
How the heck was I going to divide the vertical bars evenly between my gate? Eyeballing it would be close but not perfect and I know myself. The perfectionist critic inside me would be forever annoyed at the obvious mistakes in the gate spacing. So I found a great trick to get a perfect even measurement for any number of members you want to divide between any width of space. Watch this video where the guy explains it very simply. I can’t believe how awesome it worked and my gate PVC poles were perfectly spaced using this technique.
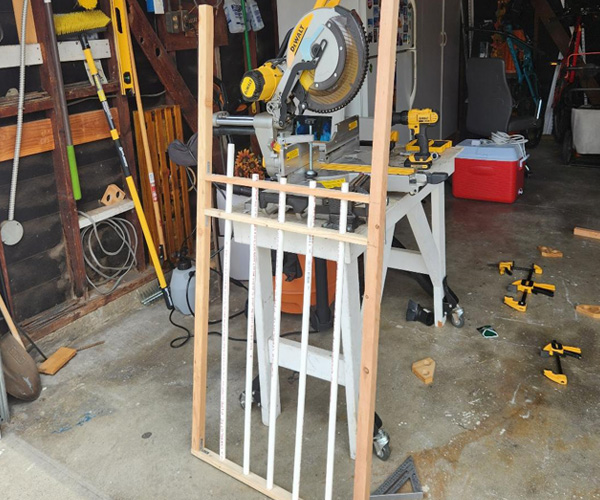
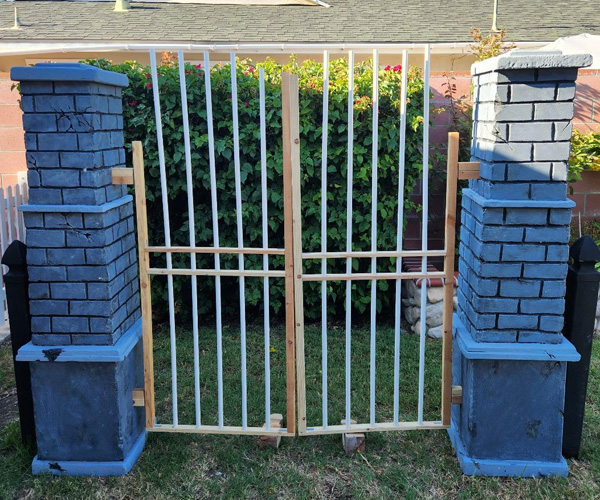
Using a 1 inch spade bit, I drilled holes in the horizontal wood in the middle of the gate to allow the PVC poles to drop through. Remove the horizontal wood pieces before drilling so you don’t chance damaging your frame structure. The bottom frame I didn’t drilled similar holes but only a little bit deep and not all the way through. That would allow the PVC to rest inside the hole so I could hot glue them down to keep them from moving.
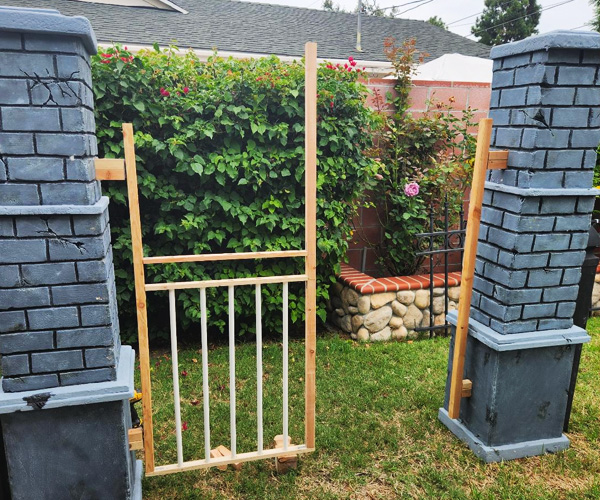
I probably attached and removed the gates dozens of times just to get my measurements right. I also added some spare wood at the bottom to support the gate’s weight since nothing was very secure yet. Notice I cut the PVC so that each ended at half the thickness of the horizontal wood support. It was my plan to connect two PVC’s together to make it look like one really long pole. That way I wouldn’t have to buy new PVC and could just reuse the leftover pieces I already had from when I had built the fence.
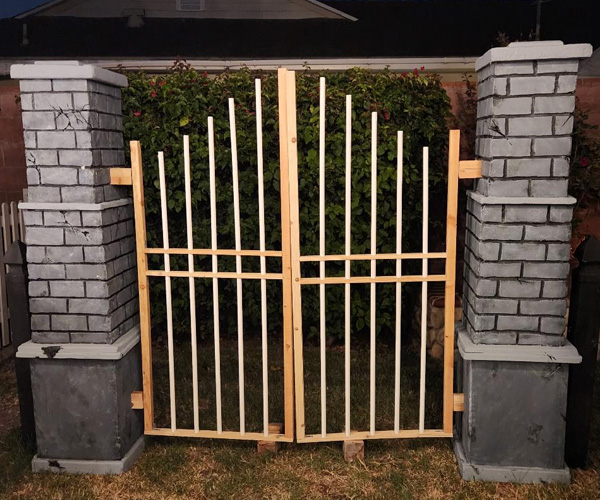
I added a 1 inch length wood dowel to connect the upper and lower PVC halves together. I then used wood screws to attach each PVC to the horizontal supports in the middle of the gate so they wouldn’t move. After this step I was really having a lot more faith in the success of this build.
The gate was starting to look really good. I decided it was time to cut the PVC to the shape I had decided on. I wanted the middle to be tallest. The middle frames wound up being 5’8 inches and the frame closes to the column was 4’8 inches. Basically 1 foot height difference between those two ends. That way each PVC was cut 3 inches shorter than the one next to it.
Adding Finials And Paint
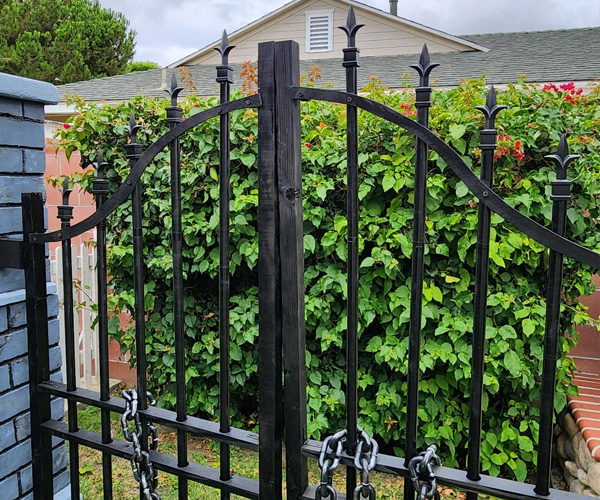
Using a heat gun I warmed up the top of each PVC pole and attached a black finial to the top. It was the same technique I had learned when building my Halloween fence. I was glad to have several left over from my fence project. If you do this make sure to use some gloves to protect your hands and arms from being burned. You really need the PVC to get really hot so it’s malleable enough to bend or shape. Finally I used spray paint to make the whole fence and supports black. To get the paint to stick better to the PVC I’d suggest sanding the PVC by hand to rough the surface up a bit. Be sure to use some breathing protection cause you don’t want to be breathing in those little nasty particles.
Creating The Gate Arches
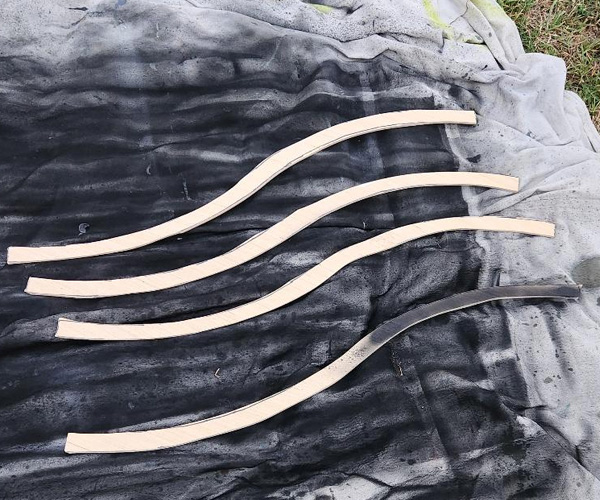
I wanted to make arches for my gate to give it shape and character. It also adds extra support to the PVC’s. First I traced a shape onto paper to test the arch would look good. Then I bought some plywood at Home Depot and using a jigsaw cut along the trace lines I drew to get the shapes you see below. They were definitely not perfect but I was able to sand down the uneven cuts to make them look a little better. Then they were sprayed black to match the gate.
I used a small L bracket to attach each end to the wood support frame. Even with just one arch it was looking really cool and taking shape.
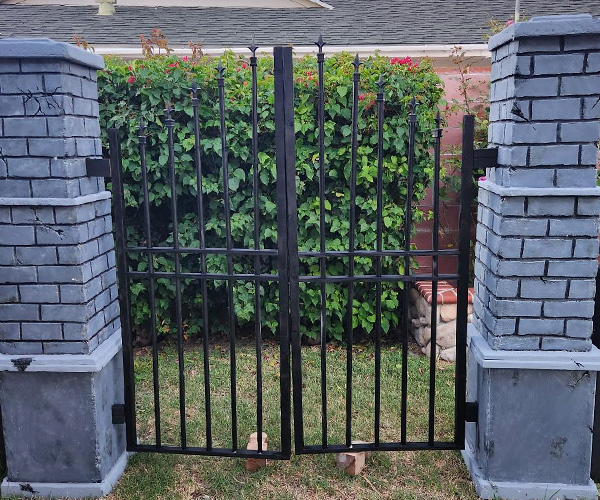
Similarly I took the second arch and attached it in the same way under the first arch. I threw some Halloween chains I had bought earlier from Michaels on the gate. Oh man I love this now!
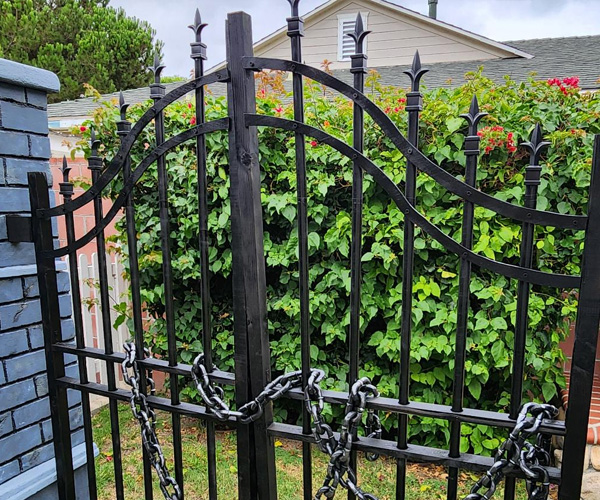
At this point I could have gone and added more detail to the gate like little PVC circles or other decor but at this point I was pretty tired of building and decided to call this one done. I think it’s kinda nice to stop building sometimes and let the prop just be as is. There is always next year should I decide to rust up the gate or add some Spanish moss or other cool idea.
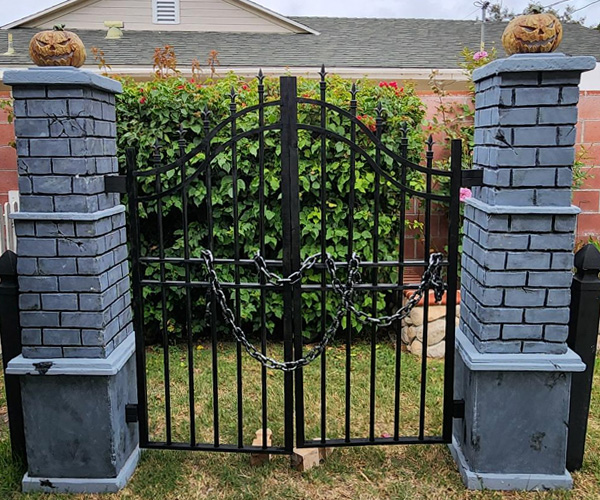
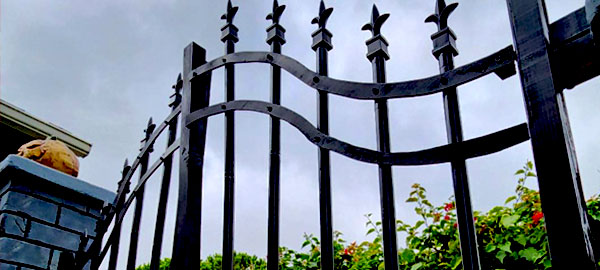
Last step was installing the fence and adding the columns and gate. I really love the way it looks now. The fact that I can open the gate and walk in is so awesome. It was weird but I thoroughly enjoyed when I was inside the gate and was able to close it behind me. Like I had special privilege to be inside. Of course I do cause it’s mine but damn it felt really cool and fun to be in there. The gate just added so much more realism and authenticity to my yard haunt.

Although it was the only thing I got to build this year I think it was well worth it. Now I’m starting to daydream about what other cool things I might be building for next year! And the beat goes on.