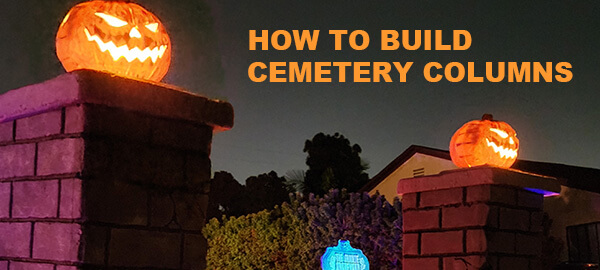
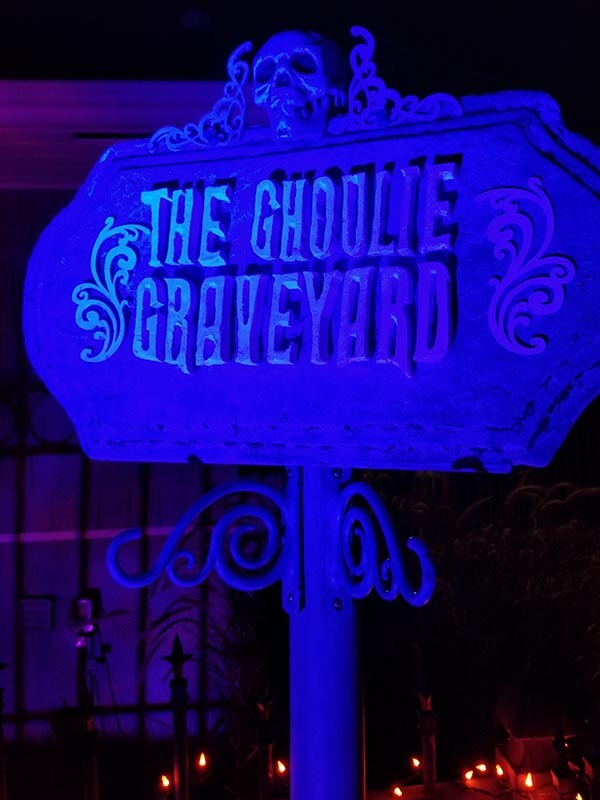
Are you one of those Halloween people that tends to overcommit yourself to build as many Halloween projects as you can before Oct 31st? Well, that’s me to a T and I did it again this year. Every year I have big plans to expand and add to my Halloween yard haunt. This year I was going to complete 6 new tombstones, redo my witch jars, and make a Halloween graveyard sign. Then I realized …uh not enough time! I was really stressing out. So I decided to kill all projects and focus on one…the Halloween graveyard sign. And you know what? It paid off. I really like how this one turned out. So I’ll share with you my newest addition and how I built it. Maybe it will inspire you to build your own!
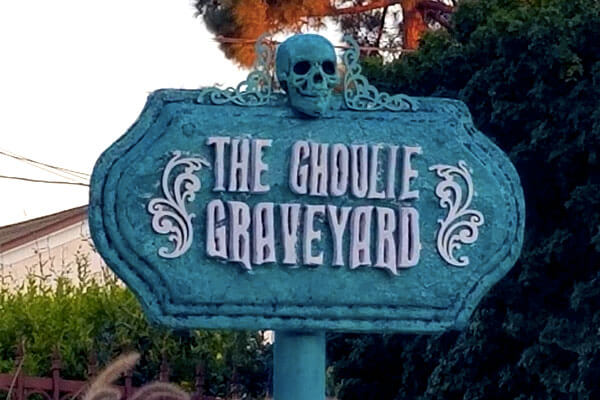
There it is in all it’s glory. The newest addition to my yard haunt. Of course being a perfectionist there are a lot of things I could have done better with this graveyard sign, but I’m still pleased with the outcome. The sign sits in the corner of my cemetery front yard display. The previous owners of my house had a flagpole in their front yard. When they left they took the flagpole with them but left the concrete pole stand in the front yard. I wanted to remove it but now realize it’s perfect for my Halloween sign so I guess it’s staying. The pole is 2″ PVC and slides right down in the hole.
Testing Out Paint Color
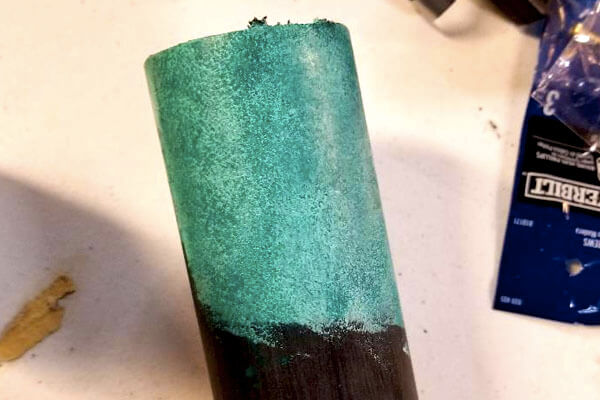
I bought the 2″ PVC at Home Depot and fortunately it was already cut to a good height. At home I measured and cut a little more off the top. Then I started experimenting with acrylic paints to see how I could get a green patina look. Instead of messing up on the pole, I used the scrap PVC to test out paint techniques and color. I started with a base coat of patina, then added a little bit of teal and wiped it off quickly to achieve the result above. Also I used a sponge brush to dab the paint on so it wouldn’t leave streaks like a paintbrush would.
Prepping The Sign
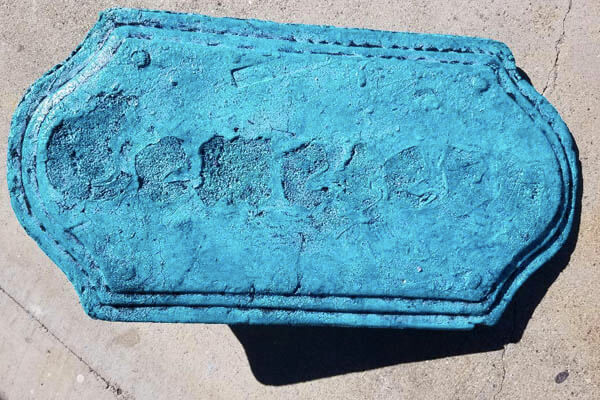
I had an old Halloween prop that I never really used and decided it would make the perfect shape for my sign. It was dark grey and had the word Cemetery on it. So I used a Dremel tool to remove the raised lettering and then used sandpaper to remove any leftover raised bits. You can still see the outline of the words in the image above. I was a little worried about this but then I figured it would be covered by my new letters anyway.
After the sign was as flat as it was going to get, I gave it a coat of black primer paint. Then I used the sponge painting technique again to dab the whole thing with acrylic patina colored paint. Finally I dabbed a bit of teal acrylic paint here and there to give it a more used look.
Creating The Letters
This was really the toughest part of the project for me. I wanted to get my letters laser cut but found the pricing to be higher than I wanted to pay. So instead I traced the letters from my Photoshop design to my 1″ carving foam. Then I bought a hot wire foam cutting tool kit at Hobby Lobby. It works great and cuts the foam like butter. However my letters were pretty small and my hand is not as steady as it used to be. At first I didn’t like the non-perfect shape of the letters, but then I started liking that it wasn’t perfect. It gave it a creepier and definitely more DIY look. I painted them all with acrylic white paint then let them dry and used gorilla glue to adhere them to the sign.
The squiggly designs I found at Michael’s Crafts. They are wood laser cuts and weren’t too expensive. The skull was another old prop that I was about to throw away. Glad I didn’t! I primed and painted all of them then glued them in place. It was a little frustrating because the glue took a bit of time to cure. I like how they add a bit of flair to the sign.
Adding Brackets For Mounting The Graveyard Sign
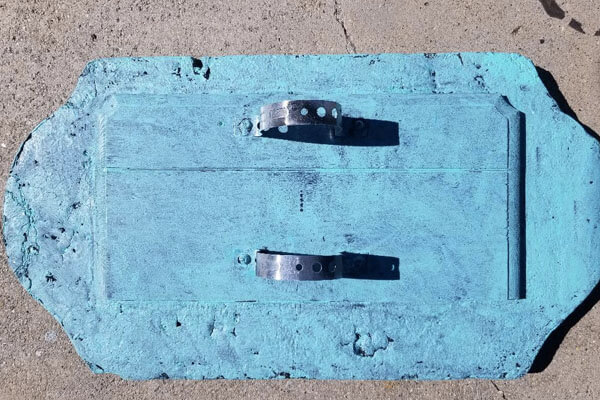
Finally I had to figure out how to attach the sign to the PVC pole. I had an extra light piece of wood that I gorilla glued to the back of the foam sign. Once that dried I used some leftover metal strap as a bracket and mounted them with small screws and washers to the wood. I just had to make sure the pole slid easily enough through the brackets. Finally I attached a mounting screw through the center of each bracket and into the pole to secure it to the sign. That way the sign sits at the correct height and when Halloween is over I can just unscrew them to remove the sign from the pole.
Hope you guys like it! Again, I’m not a pro at this stuff by any means but I do enjoy creating Halloween props. I think slowing down and focusing on one is better for me than rushing haphazardly through too many. Now if the kids like it on Halloween that will make it all worth it. Oh and I plan to finish those 6 tombstones for next year…but I’ll start much earlier this year. Like right after Christmas!