
So even though this has been a weird year where it feels like every day is groundhog day, I decided to try to break the monotony and work on a project I’ve been procrastinating on for a long time…DIY Halloween tombstones! For years I’ve used store bought tombstones for my graveyard scene. You know the ones that are odd colors and say nothing more than RIP on them. Although they looked fine, I wanted to take things up a notch and really customize my tombstones to match my theme of “The Ghoulie Graveyard.”
To note there are awesome YouTube videos on how to build tombstones. I highly recommend you watching those videos to really get the best instruction. Here I’ll take you through my experience on how I made mine.
Shape The Tombstone
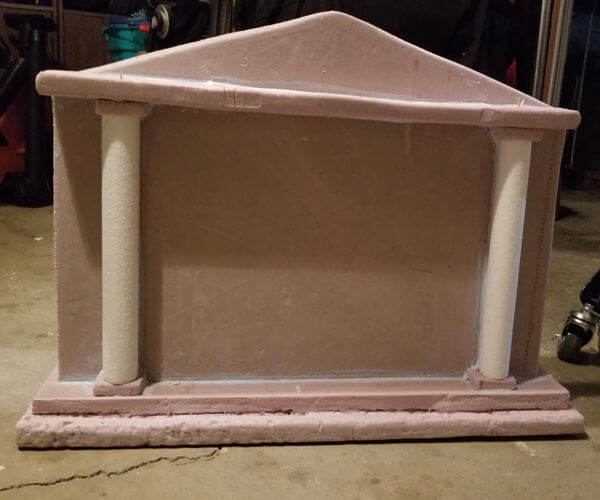
First I bought XPS foam board insulation that was 2″ thick. Home Depot may sell it but I had to buy it off a fellow “Haunter” since stock had run so low at the big box stores. Then I took a small pull saw and cut out the shapes I wanted to use in my tombstone. I cut out an opening for the base and fit the back piece inside it. I then carved a step all around the 2″ bottom. Once that was done I carved the rest of my pieces, shaped them then glued them to the tombstone with Loctite PL300 Foam adhesive. The columns were simple styrofoam pieces that I bought at a craft store.
Drill Base To Secure Tombstone
Once you have your shape built (and probably before you start glueing smaller intricate parts), you’ll want to drill two holes in the bottom base of your tombstone. I took a 1/2″ spade bit and slowly drilled 2 holes in the bottom of the tombstone. Then I took 1/2″ PVC pipe and cut it to about 4-5 inches long. I made sure to drill the hole deep enough so the entire PVC would slide into the hole. I used gorilla glue on the outside of the PVC then slid each one into a hole and waited for them to dry. You can find 1 foot rebar at Home Depot. Using 2 per tombstone seems to work best to keep them standing up in the yard. Simply use a mallet to tap the rebar into the ground then fit the PVC in the tombstone base right over them. Wind doesn’t even knock them down.
Design Epitaph
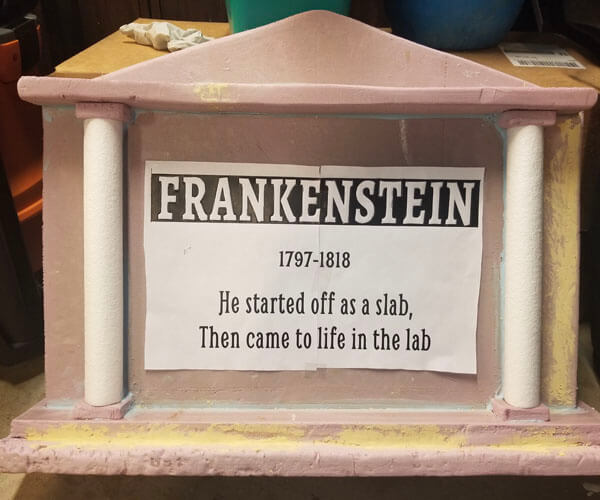
When you think of the theme of your tombstone you can start thinking of cool epitaphs that would fit. I knew I wanted to make a Frankenstein tombstone so I used Photoshop to create an epitaph with a name, dates and a clever saying. Once I had the look I wanted I exported the file as a jpeg image. The funniest thing is I used a program called Rasterbator that is a free online tool. Don’t worry, it’s a safe site, trust me! Anyhow you can import your image then create a new file at whatever size you want to print out. I’ll let you watch a video if you like on how to transfer your initial image to a large printable copy that will fit your tombstone.
I taped the epitaph to the tombstone. Looks like it fit perfectly even though it was printed using four 8.5×11 sized pages.
Transfer And Carve Out Epitaph
Once taped I took a ball point pen and traced over each letter pressing hard enough so the foam underneath would pick up the trace.
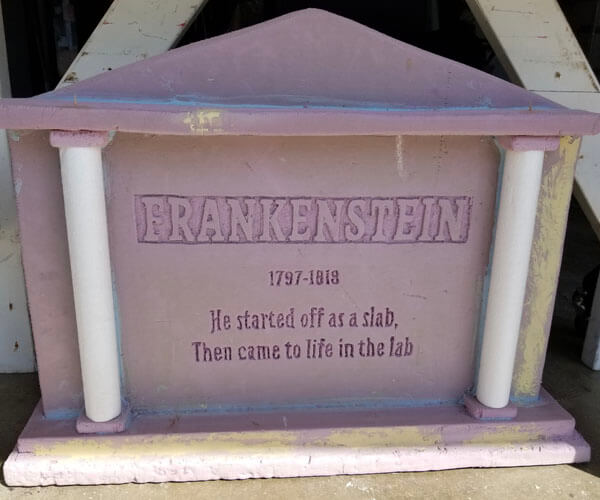
Once the tracing is complete, remove the paper and grab a dremel tool (with a router attachment and a 194 high speed cutter) and start carving. You only need to go about 1/8″ deep. For the smaller letters I used an exacto knife to carefully carve them out. Again see if you can find YouTube instruction on this. There are some really good ones out there.
So far the tombstone looks great. Take your time with the carving step. The first ones I did I rushed and it’s definitely noticeable. At this point you can use wood filler to fill in any blemishes or unintentional holes you might have. That’s the brown stuff in the image. Although you’ll be adding cracks, there are some that don’t look so good you may want to fill.
Weathering Your Tombstone
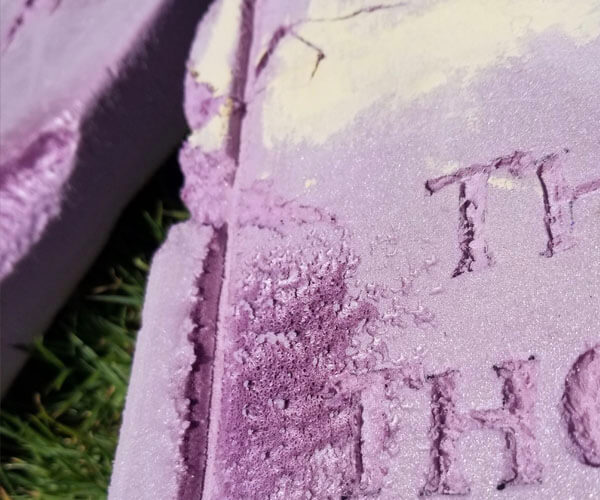
Now you can add any cracks in your tombstone to age it. I take a yellow shaver tool to remove large sections from the edges of the tombstones. Then I use an exacto knife to carve thinner type cracks to make it look old and scary.
Final step is to use a blow torch…wait what? Yeah I was afraid of this step too. So first you spray your tombstone with water from a spray bottle. Then using a small multi purpose blow torch apply the heat to the tombstone. Don’t keep it in any one spot but instead gently move it over the face that you sprayed with water. The result is a cool looking aging effect like in the image below.
Paint A Base Coat
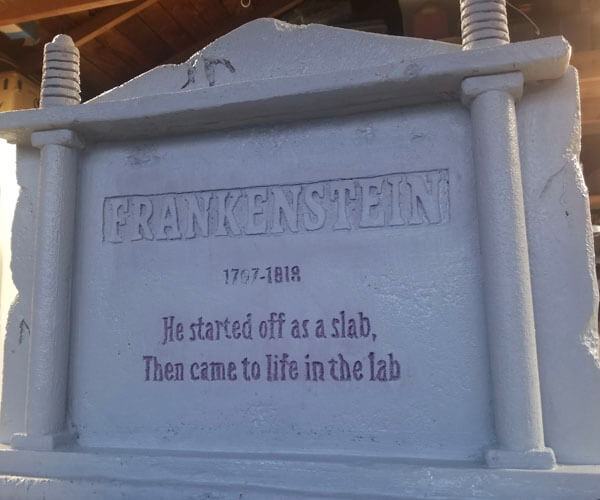
Now that your tombstone has been designed, carved, and weathered, it is time for painting. Start by giving it a solid base coat. I use Drylock grey because it has a sandy texture to it which makes it feel a lot more like old stone. Use a chip brush to get in all the crevices and front and back.
Paint Black Lettering And Cracks
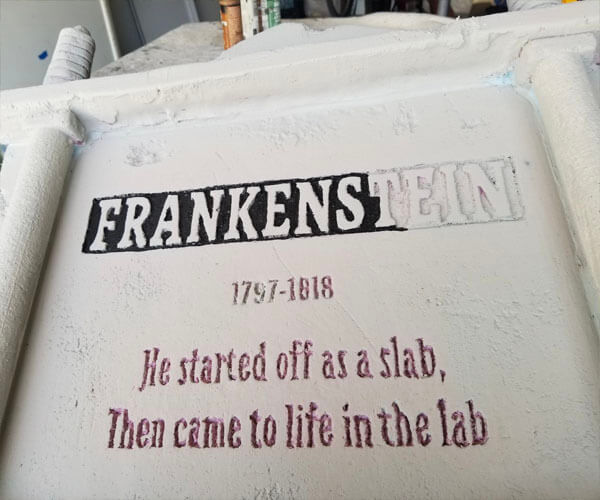
This part takes a bit of time and patience. I use acrylic black paint from the craft store to carefully fill in all text, dates and cracks I’ve created. This is what will really make the lettering stand out!
Paint The Top Coat
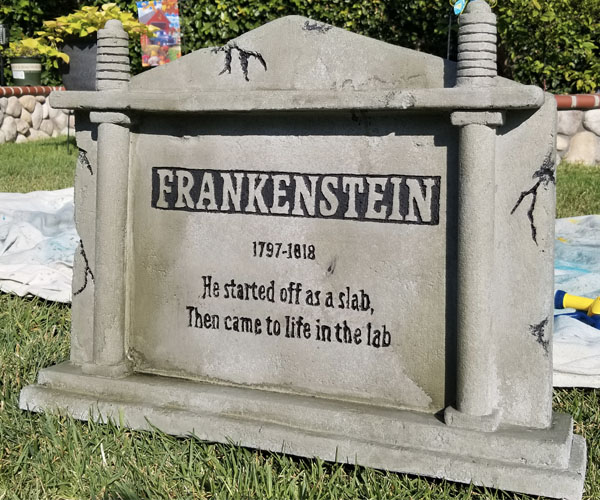
Once the base coat is dry, you get to do the messy job of applying the top coat paint. Some people just roll on a color but I like the technique of using paint in a spray bottle (with lots of water to dilute it). You can combine black and raw sienna acrylic paint to make a dirty almost mossy color to begin with. Test spray on the bottom or back till you get the right consistency. When you spray it should go on lightly and will lightly drip. This will cause a natural weathering look. Spray a little then let it completely dry then spray again and repeat. The image above is already looking great with only a few rounds of spray painting and drying. If it goes on too much, just use a spray bottle of water to thin it out.
Alternate Dry Brushing Technique
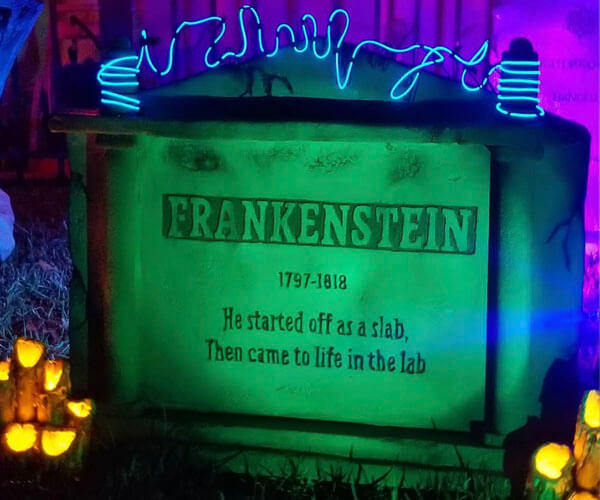
I thought I was done with my tombstone till I tried the dry brushing technique. Using a mix of the black and raw sienna paint, I dipped a chip brush in then wiped away most of the paint on paper towel. Finally I brushed the weathered areas, cracks and random places on my tombstone to accentuate the features and add more detail. I was really happy with the final result. (Of course looks even more amazing w/proper lighting and a few more props!)
Definitely resist the urge to over paint! My first tombstone turned out really dark because I kept wanting to make it a little better. The later tombstones turned out better because I told myself that it looked “good enough”. Once it’s under your graveyard spotlights any imperfections are completely lost anyway. Hoped this helped you to understand the basics of creating a tombstone. Maybe it will inspire you to try creating tombstones for your own Halloween yard haunt! Happy Halloween!
I LOVE this tombstone and have to try and build one kind of like it. Can you tell me what you used for the neon blue lighting between the electrodes? Is it strung on a piece of wire between them? Thanks, and that is a FANTASTIC tombstone!
Thanks Jeff! This was a fun one to build. I don’t have the original link but if you search Amazon for EL Wire Blue, there are several affordable options. There are also lots of other colors you can use. I got one that has the battery pack (just needs 2xAA batteries) and has a smaller wire diameter (I think around 2.3mm). I used black aluminum bendable craft wire from Michaels to shape the path from the two ends of the tombstone so I could attach the EL wire to it. At night you can’t see the black craft wire. I also used this power supply adapter for the AA batteries so I could wire it to the rest of my haunt. Hope you have some success too making your tombstone!